This month's title for LoopdeLoop is Sisters, and I'm really excited about it. I grew up with four sisters and I have always wanted to create an animation based on my experiences with them but I've never got around to it. Now I might actually have the chance.
I feel this brief is going to be more beneficial to me than the RedBubble project, as I am going to be able to practice my animating skills which I am more interested in doing than creating still 2D images in photoshop. I also have a greater interest in this topic than I do with plants, and I have a lot of first hand experiences that will help me with production.
Unpicking the Brief
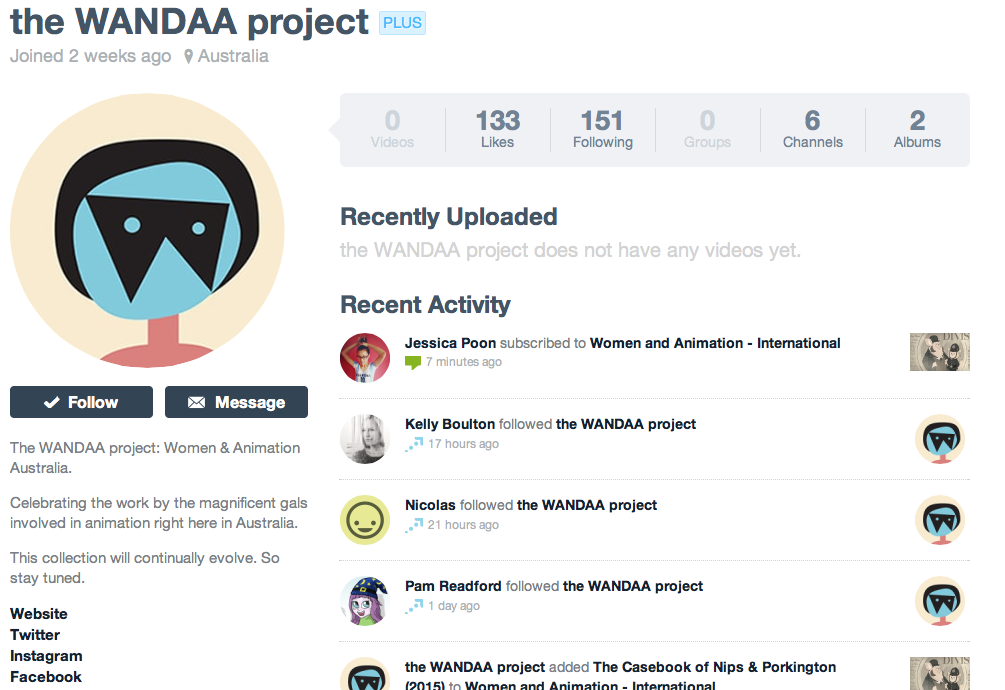
I picked out from the brief what I thought was relevant/important and conducted further research based on these points. My first port of call was to find out more about The WANDAA project.
This month's brief
(Laurie Holden is an Actress and Human's Rights Activist)
It turns out the Loop brief summed up what the WANDAA project is very well and I didn't manage to find out much more about them, other than that it's an independent project that is currently a voluntary labour of love, trying to raise the profile of female animators, producers and other female roles in the animation field.
The WANDAA Project's Website
WANDAA's Social Media
I even looked up whether they had any social media or if they had posted anything that could influence my pre-production for the better. They do have a number of different accounts but I didn't find anything that could be of use for my designing. I think the best thing to do here would be to simply create strong female characters within an interesting narrative.
For my third and final brief I was hoping to be able to produce a bunch of designs for RedBubble. The thought came around when I was doodling different plants, and I decided to add colour in photoshop and had the idea to make a series of drawings in the same style that gave different rules for taking care of plants. I actually ended up putting them on RedBubble, firstly for my own portfolio but secondly because I thought they had a 'cute pastel' aesthetic that I know can be quite popular on RedBubble.
My Designs (Nature Commandments)
Having discussed my plans with Mike, he suggested that it could be a good idea. In order for this brief to be substantial I would have to research the current market for RedBubble and try to contact people that would be interested in my products. I think this would be possible, and with the right advertising I think these could be quite popular but I'm no longer going to being doing this for my final brief. It was brought to my attention that I would be able to do a second LoopdeLoop for a substantial brief, and this month's title appeals to me greatly. Because of this I am going to be creating a second Loop.
Having said this, I'm not going to completely forget about these designs. I plan to return to them in the summer and finish off the designs I have planned out for the rest of the collection. I'm also planning on handling it like a responsive brief and I shall make an attempt to show the work to different plant enthusiasts to try to make some sales but mainly to get my work out there. I think I prefer doing this this way, as I find making designs for RedBubble something to be quite relaxing and is usually something I do in my spare time and for my own amusement and I would like to keep it this way, but this time around I am going to consider trying to get my designs seen rather than them just being in my portfolio.
The day has finally arrived. We're finished with our animation.
Final Version
Emma experimented with adjusting the shadow beneath her character's feet to make it no longer look like her character was floating, but we weren't happy with the results. Instead of spending hours on trying to edit this in post we simply decided to re-render the scene and slot it into the composition. This worked a charm, and it seems that Emma had simply forgot to save the adjustment that made the character stand firmly on the ground and that is why when she rendered it a second time it was hovering. It's great that we had managed our time well enough so that we were able to rectify this mistake, as the inconsistency would have really bothered me.
Overall I think this project has been a success. I've encountered a few problems along the way but now I feel I have the knowledge to be able to avoid them in the future, and I definitely think there will be Maya in my future as I have very much enjoyed working with it. I'm also happy that I have now experienced what it is like working in a team. As it stands I think I prefer working on my own, but I am definitely going to continue working collaboratively to benefit my working practice, and to work with different people and different amounts to see whether my view on team work changes.
Emma has finally got all of her scenes rendered and she has done a great job at adding in her character's pupils in after effects. She gave me her USB containing all of her exported videos and from there I was able to put all of our scenes together in order. The final length comes to around 1 minute and 5 seconds, because we claimed seconds at the beginning of our animation as titles, but rather than add in text in post for our title scene, we just assigned more focus to the cover of the book to act as our title scene. We have still both animated and rendered 30 seconds of animation so we're fine in that aspect.
From here we were able to revisit our sound.
Added Sound
In order to do the sound, I imported the new movie file and lined it up with my existing project/sounds from my testing. I then extended the first sound clip to the beginning of the composition, and the second clip to the end of the composition...
Editing the Sound
… but I found that I was still left with the little gap in-between the two different sections of the song. I didn't want to simply extend the 'montage sound clip' (top audio clips) to the beginning, because I liked how the other sound clip lined up with the walk and fall in the previous scene. To try and get the two sound clips to blend together, I extended them to make them overlap, and then made one fade into the other. When I played it back it seemed to work quite well but because I had been listening to the clips over and over again I could hear when the clips changed and to me it stood out like a sore thumb. I beckoned Emma over to have a look without explaining what I thought the issue was, and once she had finished watching I explained the dilemma and she said that she didn't even notice anything.
We discussed how the sound fit with the animation and we were really happy with it, the only thing Emma suggested to do was to make the sound at the end gradually fade out as it suddenly cuts to silence. I added in the fade out and you can still hear that it cuts to silence but it isn't as abrupt because it slowly gets there.
I asked Emma if she was happy with the sound or if she wanted to experiment with different clips, but we both agreed that we really liked how well this song complimented the animation. We both feel that it is light-hearted with moments that are more upbeat and intense (for the montage scene) without being overly dramatic. I like that the song is also quite repetitive which reflects the repetitive nature of trying to teach your child to walk.
We also discussed whether we wanted to experiment with further sound effects, but we no longer saw any need. The music works really well as it is and somewhat almost provides the sound effects of the child falling due to how well the montage scene lines up. We thought that any further sounds would either detract from this synergy, or they would simply get lost in the soundtrack.
A couple of fellow classmates asked if they could watch our animation once they heard that we had been able to put it all together and add sound, and all that watched said that they really like how fitting the music was and not one person picked up on where the different clips taken from different times in the song blend into one, which is a great. We also asked these students whether they would bother with further sound effects (such as the parent sighing like we had originally planned) but they had the same idea as us in that we didn't need them.
The only thing that is left to do now is final housekeeping. For some reason - even though she has rendered the scene out a second time - Emma's character still looks like it is hovering. She is going to have a look what she can do about this in after effects using 3D layers, considering I took over sound. If when she is done the final product looks worse than the hovering character, or for some reason we don't like the 'correction', then we are simply just going to deem this version to be our final version, and just make sure that in the future we leave enough time to re-render scenes if we encounter problems like this one. It's not a massive issue and it doesn't detract from the animated movements, but it would have been nice for the shadow to be as uniform as the other shadows in the scene.
We're almost there for putting all of our scenes together, all Emma has to do is draw in her character's pupils on after effects as she wasn't able to do this in Maya using a ramp shader, as she had modelled her eyes the wrong way around and also she was having trouble unwrapping the eyes in a UV map (which would have been a much easier solution than adding them in in post, if we could have got this working). Whilst she was doing this I thought I'd get a head start at looking at sound design.
I had found a selection of royality free sound clips way back at the start of the project, so I openned the ones that we had decided might be suitable in Premiere along side my 30 seconds of animation, just to get a feel for what it would look like as a whole animation.
Sound Test One
One of the sounds clips I tested was called Monkeys Spinning Monkeys, and I really liked how these sections of the audio lined up with the falls, especially during the beginning of the montage. The timing works well with the scene and the music is lighthearted and bubbly, which reflects the atmosphere of the story. The only problem I have is trying to fill the gaps in the audio were I have trimmed it to make it fit the video. I'm not sure how well I'm going to be able to mend this, but I can't find out for certain until I have all mine and Emma's clips in order in one project file. I shall have a look once she is finished.
(The video settings of this export are slightly out, causing the fuzzy lines. I shall have to change these when it comes to the final version, but for now it shall do).
On Monday night I was able to attend the loopdeloop screening that was being held in Leeds, hosted by one of LCA's third year students. It was really exciting to be able to attend, as it made me feel hopeful for the future of animation in Leeds, and I shall definitely be showing my support again by attending any screenings that are going to be held in the future.
It was also nice to see my work being screened in an environment that wasn't college, to an audience that all had one thing in common. Animation. It was a shame that the turn out wasn't bigger as it would have been nice to get the chance to talk to other animators or people that could have potentially been interested in my work, but it was only the first time the screening had been held in Leeds and it didn't get masses of advertising. Having said this, an audience is an audience, and it was nice to sit down and watch all the entries properly as I had missed out many when I was scrolling through the website.
At the end of the night we voted for which loop we liked the best out of al of the submissions, and then we had a winner for Leeds entries. We voted the overall winner to be Logan Niblock's entry and David Wevill was awarded as Leed's Loop winner. I wasn't disheartened by the fact that I didn't win, not even remotely shocked considering it was my first ever loop and I was up against some experienced loopers. Hey, I was happy enough that I had a couple of votes for the best Leeds' Loop. It has made me determined to continue to enter the contests and continue to practice animating in this way, hopefully in contests that have a better title that I can relate to a bit better.
Whilst I was at Manchester Animation Festival I attended a masterclass presentation from Tim Searle (creative director at Tiger Aspect) and to cut a long story short, we ended up following each other on Twitter and he suggested that I should send him my film when I was done. I thought I'd take him up on his offer and I sent him my progress so far with this project (my 30 seconds of rendered animation).
I think what Tim said was accurate and fair, and if I had more time I would love to go back and re-visit my scenes to try and give the character more weight, but If I were to do it now I won't have enough time to do post-production work and ultimately get our animation finished. I think the footage as it stands is a good attempt, especially as it is my first ever time animating in Maya, but I would love to return to it in the future to see if I can make it less 'floaty'.
Bojack Horseman is a show that I thought of immediately when we started designing for this project simply because their characters are bipedal animals, but they are animals that usually don't walk on two legs just like our "Giraffelope" characters.
Bojack Horseman Official Trailer
I found looking at Bojack to be beneficial to our animating as it made me realise that I would just be able to look at human video references rather than trying to mix the characteristics of a human, deer and giraffe, as the characters in this show move exactly as a human would (give or take). Although it's not the style we are aiming for with our own animation, I still found it to be useful to look at as we wanted to create a similar movement for own characters but in 3D, and a little more... realistic?
Way back during our interim crits, Constance approached me to show me some animation that she thought would be of use to me. The animation she showed me was called La Chair De Ma Chère by Antoine Blandin. I wasn't sure what the animation was about fully, as we were only able to find the trailer online and it was all in french (having translated a website where the animation has been discussed, I have discovered that it is supposedly about a child taking refuge in his own reality after a tragic event) but the main characters were deer, and it was interesting to see how they had tackled making them move standing on two legs.
La Chair De Ma Chère - Antoine Blandin
The animation was a lot different to the style we were aiming for as it was made up of blocks and was very geometric, were we were looking for smooth characters that moved much like humans would. However it was still nice to look at and to see the other directions in which we could have taken our own animation in. If I were to redo it, I think it would have been nice to adapt an approach like this and make the characters less 'realistic' and look at how we could have made our characters and environment more obscure and cartoon like.
I never thought I'd see the day where I had successfully managed to model and rig a character, and use it to animate 30 seconds worth of animation, but that day has arrived! I've managed to get all of my scenes rendered and I couldn't be happier, Maya was starting to drive me insane from working on it day in and day out.
I had saved animating the montage of falls until the end as this way I would know for sure how many clips I would be able to fit in the remaining time, but because we had planned out our animatic pretty much to the T in terms of timing, I found that I still had 8 seconds for the montage which is what was originally planned.
As a reference for this scene I had to look for another video. Previously I had been working from a YouTube video called "10 Month Old Baby Learning To Walk" (which is what we had also based our original timings from different sequences in the video) as a reference for how the child was going to interact with the sofa and walk away from it and I had also looked at another video called "Baby Jude Stands Up For The First Time" as a reference for how the child was going to stand up unaided towards the end of our animation. For the montage I wanted to find a video that featured a quick fire of clips of a child learning to walk so I could get a feel for how my own montage was going to play out. I found a time-lapse of a little girl learning to walk and I thought it was just what I was looking for. Though the video had a lot of the child standing around, as well as interaction from other people, I was still able to use certain falls as a reference, looking at the motion and the timings between each of the keyframes.
10 Month Old Baby Learning To Walk - Reference One
Baby Jude Stands Up For The First Time - Reference Two
Time-Lapse of Baby Learning to Walk - Reference Three
I was able to animate the scenes relatively quickly for the montage and to save myself a bit more time I re-used some of my fall sequences that I had previously animated. I simply created a different camera and changed the angle of it, as well as the position of the child in the scene. I think this was a good idea as it now means we're closer to post production, and also I don't think it's too noticeable that the animation has been re-used. Even so, if it is noticeable I still feel it is acceptable to recycle animation especially as it is being used for a montage, which is kind of the point of a montage anyway.
All of this was relatively easy to do as I was following my reference videos as a guide, and by this point I had gotten quite used to animating in Maya (animating walking and falling sequences were starting to get a little bit repetitive), it was the rendering that I seemed to have problems with. I had set up my render settings exactly the same across all of my scene files before I began rendering so I know that the visuals would be universal, but when I came to batch render some scenes it would get stuck at the first frame. This really confused me as my render and camera settings were exactly the same across the board, yet some just didn't want to render. I googled my issue and found that a number of people were having the same problem, and the general idea I got was that it was to do with the recent Maya update. I'm still not quite sure what the problem or how to resolve said problem (in the end I just kept reopening the files and trying again and eventually I got results) so I'm not sure how I can avoid it in the future, but if I ever do come across this again I shall have to see whether there have been any updates on the forums that I checked out regarding this issue.
All My Rendered Scenes - Completed 30 Seconds of Animation
I imported all of my image sequences into After Effects to see how they played back and I'm really happy with them. Some of the shots are a bit darker than I expected due to the camera angle but I think it shall be okay to leave as it is as the change in lighting in the space is - in my eyes - realistic and expected. I shall see what Emma thinks, and see how her frames look once they're rendered. If she feels that they're too dark, or that they don't work well with her material then I can look at altering the levels in post-production. I can't go back and increase the Ambient colour of the material/giraffe texture as it was at the highest it would go before it started to distort the colours of the texture altogether.
Now all that is left to do is to get Emma's animation sorted so we can stitch it all together. I'm really excited to see how it will look when we put it together because my animation doesn't have a great deal of narrative as a stand alone piece.
I'll keep this one short and sweet. Today I've managed to get a further 9 seconds of animation finished, leaving me with a remaining 11 seconds which will make up two of my storyboard panels.
Storyboard Panel 3
Storyboard Panel 5
I'm really pleased with how far I have come in just three days, and I can't believe I'm close to completing my 30 seconds of animating. I am going to revisit these sequences and look at the graph editor to see if I can improve the timings and the smoothness of these clips, but I think they're close to being finished as they stand. I am also going to see what others think about the camera movement in 'Panel 5' as I am unsure about it, but either way this will be an easy adjustment if I/we feel it needs to be changed. I think the camera's movements in 'Panel 3' are good as they are, and I like the subtle zoom in that occurs, it makes the shot more interesting to watch.
Today we had our final critique, and it was a great opportunity to talk about what we had so far and it was interesting to see what other people were up to and how far ahead we were/weren't in comparison. I think the session went really well. We started by showing our scene file and discussing the problems we had both being having with our characters; Emma's being that she can't get her model UV mapped, and my issue being that my character had completely stopped working/moving in the scene even though I hadn't done anything to it since last time it was working (I have since re-imported a previous version of my character into the scene and it is now working, thankfully).
We then showed our animation progress that we had both rendered out to see what a final product could potentially look like, and we got really good feedback which was great.
My Animation Progress
Emma's Progress
The general jist of our feedback was that the character was very cute, and the subtle shakes made the struggle of him standing and walking believable. Similarly with Emma, the subtle flicks of the ears made the character more interesting as he is just standing there. As Emma's character doesn't do a great deal of moving, it was suggested that we really need to nail his poses to emphasise his character and give him more life, which I think is a MUST.
In previous crits it was suggested to us to add texture to the sofa and when I asked about it this time around we were told not to bother, as the lighting seems to have given it texture anyway. This is what I was thinking anyway and I like how it makes the character stand out, but I still wanted to see if others shared my opinion.
The impression I got from the crit was that we can just continue working as we are. The animation is looking good and we have divided our work load well. It seems as I have a harder task tackling some of the walking sequences with this character, but to balance this out Emma has suggested that she will take more responsibility with post-production, which I think seems fair.
I started by importing my character into the environment, made sure the character was scaled appropriately against the sofa (which I ended up remodelling as I was unhappy with the shape) and began animating one of my designated scenes. I thought I'd start with one of the scenes were the child pulls itself up against the sofa and attempts walking away from it. I had managed to animate a good couple of seconds when Maya decided it didn't want to work anymore and I lost my work. You'll now realise that my first sentence was sarcasm.
I angrily took an early lunch break and made sure to move to a different computer once I had done as I seemed to be having reoccurring issues with the one that I was at. I NEED to remember to keep saving in future.
When starting fresh in the afternoon, rather than race ahead on my own, I thought it would be best to set up a scene file that me and Emma could work from. The scene would include both the characters and props, all positioned and scaled correctly so that this will be consistent across all of our scenes. The same goes for the material attributes of all said objects as well as the render settings.
Remodelled Sofa and Added Building Bricks
Modelled Table and Book
Whilst I was waiting for Emma to finish her character so I could begin animating again, I thought I'd test making some textures for some of the objects to create a little bit of contrast between them and the background and some of the larger props. The book cover is definitely going to be an important object to have a texture, as one of the scenes will focus on the cover to enhance the narrative and explain what is happening in the story, so I started with that one.
Book Texture
Toy Block Texture
It turns out that Emma has been having trouble with UV mapping her character. When she tries to unwrap her model to make a UV snapshot the model breaks and no longer works as an animated rig. So we have decided to import the character untextured so we can get started with animating, and see what we can do about this problem at the end. It may have to be a post-production job if it doesn't work.
Once again I've reached the end of modelling a character and I couldn't be happier about it. I feel like I have come a long way with my Maya skills, and despite all the issues and frustrations I have had with it, I definitely think Maya is something I could be interested in (but we shall wait and see how animating goes first).
Finished Model - Posed For a Turnaround
Again for finishing of I had to make sure everything was clean and working, basically in a condition fit for animating and I feel it was. I was able to position the character how I wanted to without any problems, as you can see in my video. I positioned him in a pose similar to what I felt like once I had finished modelling.
The next step in my demo character modelling was to paint the weights of the mesh. At first I thought I was going to enjoy this step as on paper it looked quite therapeutic, but never have I been so wrong. I understood how everything worked and that I could replace colours with different values/colours all the way from no influence (black) and 100% influence (white), all of which could be smoothed out with the smoothing brush, but for some reason it just wasn't working for me.
I would start by painting - for example - the finger tips, and I made my way up the hand and arm, painting the influences as I went along, but I found that when I went back to check how everything was looking some of my weights had been reset.
Examples of How The Pinkie Knuckle Had Reset
(Weights on the Back of the Hand Even Though It Had Been Removed Before)
Example of Wrist Weights Resetting
(Weights on the Back of the Hand Even Though It Had Been Removed Before)
Examples of Other Fingers Having Influence on The Index - Removing These Influences
I really didn't know why this was happening. To begin with, Mat suggested to me to try binding the body mesh to the skeleton again, as something may have gone wrong there. I did this, but to no luck, the weights were still resetting. In the end I had pushed this model to one side as I thought it would be best to focus on modelling my own character. It is only now that I have returned to finish this demo character now that my own is completed. Having had no problems with the weight painting on my own, I'm not sure why this model is any different, but I have the feeling it is to do with how I was painting the influences or how I had the bind set. With my own character I lowered the maximum influences on a joint and this seemed to work fine, but it has also been suggested that because this influence is greater on this model that I will need to smooth out my weights further so that all the vertices have at least SOME influence. It might have been because some vertices had no weight to them that they were assigning themselves weight.
I decided to not get so worked up over this stage, as I wasn't going to be animating with it, and did the best I could with the weight painting before moving on. I know have knowledge of how to paint weights properly with my own character so I am happy to move on, at least now I know of some problems that I may have to think about in the future.
To begin with I was thinking of having a calming/upbeat song/music clip playing at the start and having it cut out with the sound of a vinyl needle skipping when the cat fails its jump. I quickly decided against this idea as there was the issue of when will the song be introduced to the animation, and also it seemed like those kind of sound effects could be quite annoying when played on a loop.
Instead I opted for a more subtle approach of having outdoor ambient noises playing, and have the cat quietly meow as it is contemplating the jump, and the sound of it landing when it falls to the next platform. I found the appropriate sounds on a royalty free sound effects website and implemented them into my animation using Premiere. I was ready to send off my loop when I realised one of the noises I had chosen had a creative commons licence meaning I would have to credit them for using the cat sound effect. This would be fine if I were uploading to YouTube or anything like that, but I was unsure whether or not I would be disqualified from LoopdeLoop if I credited someone else's sound effect, even though it was royalty free. Instead of taking the risk, I decided to look for another sound effect.
Final Animation
I'm pleased with how my loop has turned out, especially as it is my first time creating an animation of this nature and entering in this competition. It has also been quite a while since I have used photoshop and after effects to animate (I haven't touched them since last year when I made my 'Target' title sequence animation) so it was nice to get stared with them again. I was actually feeling quite nervous as I had been out of practice, but I have now sent off my entry and am awaiting to see whether it meets the requirements to be considered and featured on their website. Wish me luck!
As I was happy with my idea, I thought it would just be best to begin working on it. I started out by designing the environment. I didn't want this to be too complicated as I was going to have to make it loop, so I opted for a simple ground like platform complete with grass.
Environment - Example of the Looping Background
I really liked the colour palette I had chosen for the environment and wanted to continue with the pastel colours with my cat. My favourite colour scheme out of the ones I had planned out in my sketchbook was black and white/grey, but when I came to test these colours on my environment, I felt that they didn't stand out enough and it made the aesthetic feel duller. Instead I decided to go for a ginger coloured cat as this complimented the environment well.
Testing Cat Colours Against The Background
Rather than draw the cat with a black outline which is what I usually do with animations of this nature, I decided to try a new style. This time I chose a slightly darker shade of orange to draw my cat in, so that when it was coloured, the outline of it didn't feel as 'harsh'. This style was also much more fitting to the rest of the environment, as nothing else had been drawn with a definite outline.
To draw the cat jumping, I had used a variety of reference videos I found on the internet. The first couple were videos of cats "failing their jumps", and for the second half of the loop when the cat lands on the new platform, I had referred to SlowMoGuys' video on a cat landing on its feet. I found this was very useful as I could easily pick out keyframes to recreate in my animation.
The Struggles of Getting my Animation to Loop
(Yes I'm Aware There Was Likely to be a Better Way Than This, But it Worked For me so Shush)
Once I was happy with my jumping sequence, I imported the image sequence and photoshop components into after effects so I could make the animation loop correctly. I found it quite hard to get my components to line up perfectly, especially as there was no way for me to onion skin between the first and the last frame. I was also going about moving the camera between the two levels/platforms all wrong too; I had actually created a camera to follow the cat as it jumped down the hole, but this would mean the camera would snap to it's start location very obviously, which I didn't like. In the end I found it was easier to have the camera stationery and move the layers, as I could move them all at once.
I was happy with how the animation was looking/looping, but I felt that it was lacking something. I figured that the animation needed more of a narrative because as it stood the cat was just jumping down from platform to platform. I went back into photoshop and drew up a food bowl and some yarn, two objects that I thought the cat could jump towards. The addition of these items was quick and easy - I could get them to move in time with the ground they were sat on by parenting them to that layer - yet I think it greatly improved the piece, as it gave the cat a motive to jump.
Added Props
Now that I have my animation looping nicely and all my props and pieces in place, it's time for me to consider adding sound.
The day I finish my model has finally come. In this morning's studio session, I sat down and added the finishing touches to my character, which involved creating custom attributes to aid the character's movement. The first one I looked at was making my giraffe blink.
Added Blink Attribute
This was very straight forward; all I had to do was key the 'blink value' at 10 when the eyelids were fully open, and then key it at 0 when the eyelids were set to close (or the other way around, I can't remember but it doesn't make a difference). This means that I can now make my character blink without having to set the keyframes of each of the eyelids, which will be a lot easier in the long run.
The next attributes that the video tutorial looked at was ones related to the hands and feet. I completely skipped out the hand section of the video as my character doesn't have any fingers to bend, but I did look briefly at the feet. I know my character has hooves for feet, but I thought 'Peel Heel' might have worked/been beneficial as the character would then be able to move more realistically/smoothly.
I was wrong.
Trying out 'Peel Heel'
When I rotated the peel heel attribute it distorted the hoof in a way that wasn't realistic. I feel that the peel heel would have worked if the hoof had been longer, but because of the size this hasn't really worked. I have now removed this attribute but at least I know how to set up the peel heel for any future projects, an I also know that it is not an option for this character.
The last thing I had to do was to neaten up the outliner, and make sure that the character could be scaled effectively. This was another easy process as I just had to select the correct components/groups and Constrain > Scale, and now I am finished with modelling and have a nice and tidy outliner which will make it much easier to animate with.
Final Outliner
My next step from here is to consult with Emma about how she is getting on with her character, and discuss how we are going to tackle animating as I am now ready to get started.
I had established a starting point of having a "quirky character" in my animation, so with that in mind I started to brainstorm ideas. As I was wanting the character to be the main focus of the loop I began to think about what the character could be, or based on. My first thought was an animal as they have the tendency to be quite funny and there is masses upon masses of animal videos on the internet to show this. Because of this, I thought animals would be a good way to go, as they can appeal to most people and there would be a lot of reference material I could use.
Brainstorming Ideas in my Sketchbook
I started by jotting down animals that I find amusing (because after all, the brief is looking for what makes ME laugh), but I soon couldn't think of any more ideas. So I decided to do some 'research'. I opened up Reddit and searched for funny animals, and spent the best part of an hour watching stupid animal videos in an attempt to make ideas coming rushing to me.
It worked, to be fair.
When I was thinking of the potential character/narrative, I also considered how I could make them loop, and jotted down the ideas that I thought could work as a looping animation. I got many more ideas than what I wrote down, but when I was sketching my cute little piggies, I got an idea that I wanted to explore further. The idea was a cat that goes to clear a space but fails the jump.
Developing Cat Idea
I thought this idea was the best I had had so far, and thought the audience would appeal to a greater number of people - I know most of my friends find cat videos amusing anyway - so I went ahead and developed it further and got some designs done. The narrative was simple, and would be easy enough to make loop, it was the style of the character and the setting that I was more concerned with. I quickly researched cats and looked at the different breeds and colours, before deciding I wanted the cat to be quite basic and squishy. I will decide on the colour and the shape when I have created my environment, which shall be my next step towards completing this brief.
I have done a lot of work on my model since my last blog post. Since then, I have created the skeleton, made the controls, created constraints on said skeleton and controls and connected them accordingly. I have also bound the body mesh to the skeleton and painted the influence weights. For the most part I had to follow the video guides that Mat had provided us with, as it was a long process and I couldn't quite remember how to do everything, and I wanted to make sure I did it right so I didn't reall encounter too many problems. I had to get help when it came to making the arm IK handles as I was unsure how to do this, and I had made the odd mistake that Mat helped me to put right (for instance having single chain IK handles in the legs rather than rotate-plane) but other than that I didn't find the process too difficult as it didn't differ from my first experience doing it.
My Controls
When it came to connecting my controllers, I soon realised that I didn't need all the ones that I had made (I.E the forearm roll, the elbow and the shoulder) due to having IK arm handles. Had I have realised this sooner I would have saved myself a fair bit of time, as I wouldn't have had to shape the controller, position it, create a null group for it and set up a constraint. It wasn't a massive hinderance to remove, but I definitely know for next time that the controllers are going to be different if I am using IK handles.
Weight Painting - Before
I definitely found painting weights much less frustraiting this time around. For some reason on my demo character, my painted weights kept resetting (in the fingers especially) which was making me very frustraited. It also made it very hard for me to make the mesh do as I wanted. I think this was down to how the mesh was bound to the skeleton, but I can't say for certain, but just as a small experiment when I was at the binding stage, I decreased the maximum influences to see if this would work better, and I didn't seem to have any problems in terms of the paintings refreshing, so I guess it must have worked.
Weight Painting - After
There isn't much left to do with my character now. I will probably have another look over my weight painting to make sure everything is working correctly and get another opinion on it, but then I've just got a few finishing touches to add; I couldn't be happier.
The next brief I want to engage with is the current competition that Loop de Loop are holding. Loop de Loop is a wesbite that hosts an animation challenge bi-monthly. Anyone can enter and when the deadline is reached the people at Loop host a screening of all the posted loops and during said screening a winner is announced.
The reason I want to tackle this brief is because;
a) It relates strongly to my field of practice. You have to create a looping animation or gif.
b) It's a great opportunity to get creative.
c) You are able to see ALL entries and all of them are screened. Even if I don't win at least my work will be seen by a larger audience than what I'm used to.
and finally d) This/next month, there is actually going to be a screening for Loop de Loop held in Leeds. This means that I'll be able to attend the event and potentially meet people that could be interested in my work if I enter.
This month's theme is: LOL.
Picking at the Brief
Before I got started with brainstorming ideas, I thought it would be best if I took a quick look at what JibJab do. I've not heard of them before so I have no idea what they're about, but I thought it would definitely benefit me to find out and see what THEY find funny, considering they're sponsoring LoopdeLoop.
Selection of E-cards by JibJab
JibJab is a digital media company that is "dedicated to making funny things worth sharing". They have been around since 1999 and currently create E-cards that you can feature yourself in, whether it be a seasonal card, a greetings card or just something for "everyday fun".
A lot of the cards seem to have a general theme running throughout, a small bodied character that has a large head (which can potentially be your own), but there was one clip on their website that really stood out from the rest, and that was this one...
I definitely think a character of this quirky nature is the way to go. This will allow me to get creative with my designs, and will also allow for me to create a fun animation which I think is most tailored for this brief.
In this evening's twilight session, rather than receiving a lecture about our module or be given further information, we sat down to watch "Made You Look", a documentary about creativity in the digital age. I found it really interesting. The film was only about an hour or so long but it gave great insight into what it's like creating work in this day and age.
Ian Stevenson
I thought it was nice to hear different practitioners point of views, and how they got into the industry and where their influences came from. It was also refreshing to see both sides of the argument when it came to digital and hand made. Personally I think there is a great demand for both, and both methods are better for producing different things, so I don't like that some people didn't really appreciate the beauty of digital media and vice versa.
It was also interesting to see the influence that social media had on the different practitioners. Some artists thought it was essential to getting their art work out into the world and getting clients on board, whereas some didn't feel the need for it at all, and said they wouldn't mind if the internet actually shut down for a while. Which to me was baffling. Having said this I shall take away that it isn't necessarily essential as there are other means of getting your work done, but on the other hand I think as an animator it will definitely benefit me to stay on top of social media as it will be much easier for me to take advantage of it.
Another thing that I will take away from the film is to not be so precious about my work. "Just make something." Sometimes it is just as important to stop waiting around for a client to come to you, but instead make the work you want to create and just get your work out there. This will give you practice and help build your skills, but also you could attract new and different clients with the work you produce. It's better to be doing something.
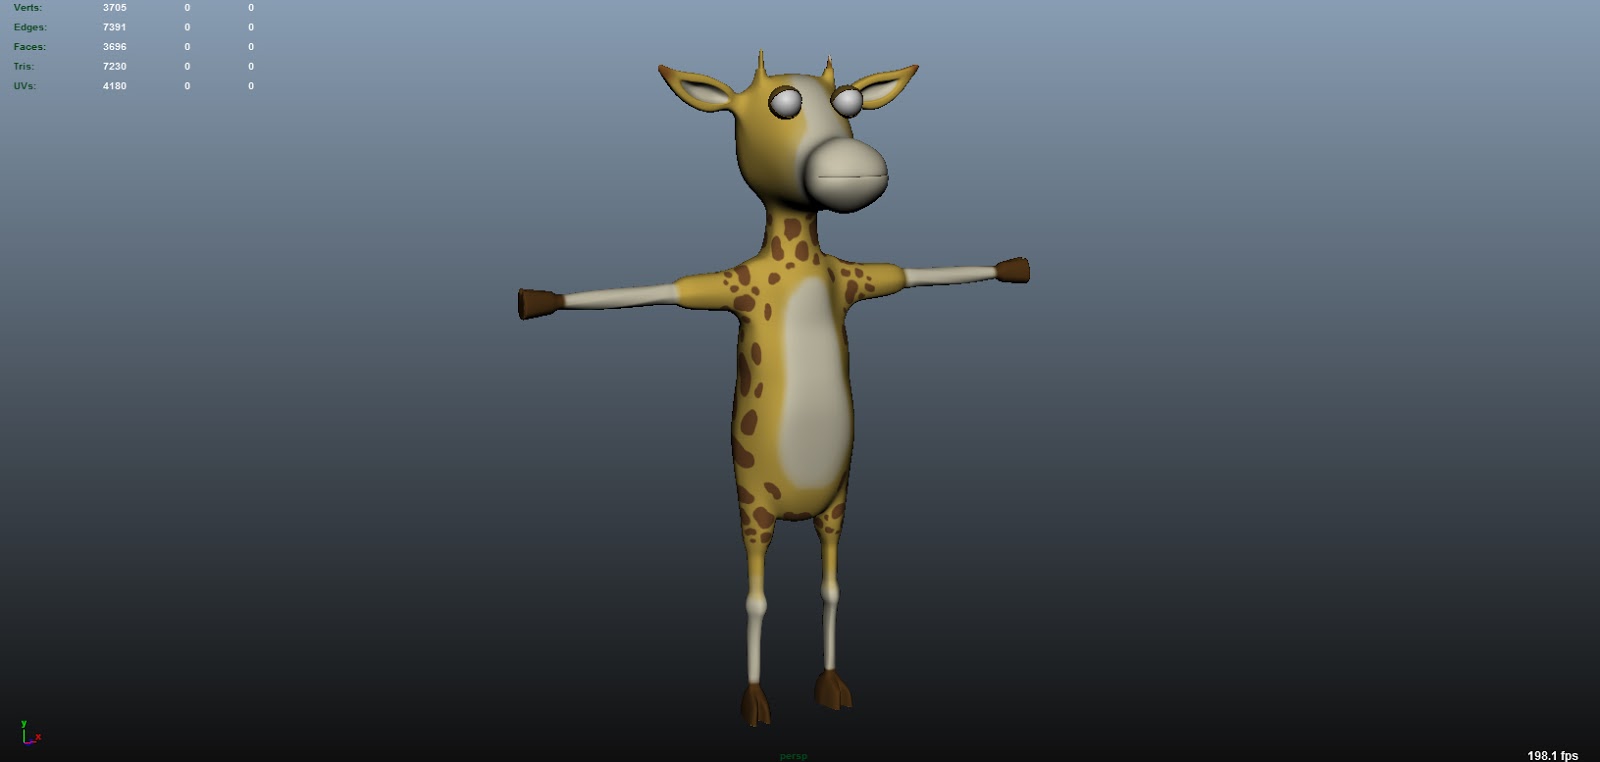
This morning I started off by tweaking my model's texture as some things didn't quite line up as I wanted them to. I have now added more spots to the Giraffelope and made some of the spots along shell edges line up better. I have also gone ahead and added the same texture to the eyelids, and gave my eyes a ramp shader to make it appear as though the character has pupils. Whilst doing this I discovered you can add more than two colours to the shader, so I gave my character an eye colour whilst I was at it, just as the icing on the cake.
Updated Texture
The next thing I felt I needed to do was to test out my now fully textured character in our chosen environment. I imported the living room scene file and resized my model to show it's actually a child, and positioned him accordingly in the scene. I had to readjust the render settings as they weren't imported alongside the living room, but this was easily done.
My Giraffelope in the Chosen Environment
There's something not quite right about this scene. I think it has potential to look really nice but as it stands at the moment I think the character is too dark and isn't as vibrant as what I had imagined him/her to be.
Ambient Light Test
In an attempt to correct this, I experimented with different lighting. Here I have used an ambient light to illuminate the character, and as much as this is an improvement I was hoping for something more consistant. If the character gets closer to where the light is positioned then you can see the light reflecting off of the surface. The same result applies if the light is too intense. Also, this method will only light up the surfaces that are facing the character. The back of the character is not lit up and is therefore not as vibrant as I was hoping the character to be.
Same Light Test From Different Angle
I didn't know how to get around this problem. My first thought was to add another light that would light up the back of the character, but I figured this would get very complicated very quickly, as I would have to consider the positioning of all these lights when multiple characters are introduced and they become animated. So I asked Mat if there would be any way to light up my character without using lights, and he suggested to change the ambient colour of the material.
Testing Different Degrees of Ambient Colour
Final Draft Render
I very much prefer this to the lighting effect I was achieveing with the ambient light. It is also going to be much more consisent than having a light, especially when it comes to animating the characters. By altering the texture's ambient colour it is going to make my life (and Emma's) much simpler.
Now that the character was complete it was time to UV map. This was a very simple process as I just had to follow the notes I had taken from first time I did this, and because the character is similar in shape to the demo model I UV mapped I found it very easy to follow my notes. I had cut up the model into different shells and arranged them on the map in a way that would make sense to me. Like so:
Character UV Map
Once I had finished this I was able to open the image file into Photoshop to create the character's skin. Here's how it looks:
First Attempt
I'm really happy with how this is coming along but there are some things that need tweaking with the skin. For instance there are some spaces that I want to fill with brown spots, and some of them need lining up/re-positioning. I also need top add a ramp shader to the eyes to create a pupil, but I shall do this once I have 'perfected' the texture.